Previously, I’ve written about reactive programming and spoken at a few events about the usefulness of it in building highly interactive applications. It was especially handy in Conflicts in the Democratic Republic of Congo, the latest data visualization app that I built for Qlik’s 2017 Hackathon with the UN. The Timeline page uses an animated timeline to visualize changes over time but gives users the ability to control the timeline like a video player using a progress bar.
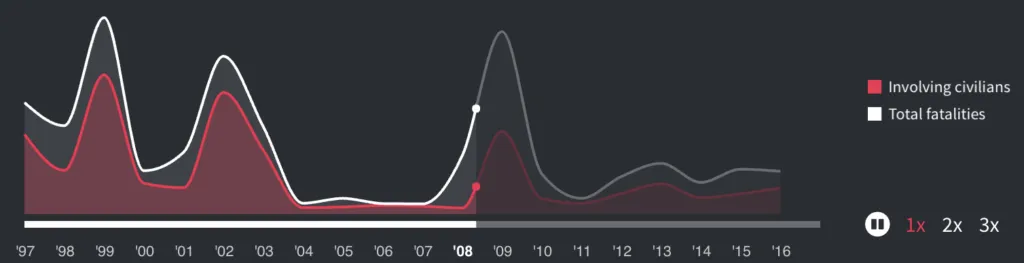 The progress bar in action
This progress bar is a great example of how you might use RxJS to handle an interactive component with lots of moving parts. I will show you how to create a simplified version of it, explaining the process along the way.
To keep things simple, I will walk you through building a basic, utilitarian progress bar with a range input element. You can take these concepts and easily create a fancy slider using other means such as SVG for example. Here is what our final progress bar will look like:

We will leverage d3-timer and RxJS to create the progress bar. You can find the working example with code here.
Our Requirements
First, let’s review what our progress bar should do:
- It should display the current time of the progress in milliseconds
- It should max out at 10 seconds
- It should have a “Play” button that starts the progress bar moving forward from whatever position it is in
- It should have a “Pause” button that pauses the timer, and a “Stop” button that resets the timer back to 0
- It should have 2 speed options: 1x and 2x actual time
- A user should be able to click or drag the slider to any point to change the current position of the timer
The Code
Let’s go through the code section by section, with explanations for each piece.
Creating a timer observable
Let’s set a max duration variable for our timer of 10,000 milliseconds, which we will use later. Then, we’ll create a timer Observable by wrapping d3.timer:
// The time duration of our timer
var maxDuration = 10000;

// d3.timer wrapped in an observable
const timer$ = Rx.Observable.create((observer) => {
    // On subscribe, create a new timer
    const t = d3.timer(elapsed => {
        // Pass the elapsed time from the timer
        observer.next(elapsed);
    });
    // Stop the timer when unsubscribed
    return t.stop;
});
timer$ is an Observable that will create a new d3 timer instance for each subscription. When an unsubscribe event happens, the timer for that observer will be stopped. d3 timer does not have any pause functionality, but rather only does two things: it starts spitting out cumulative times since it was created in milliseconds as often as it can, and it can stop itself. Thats it. Therefore, to build a timer that can be paused, set to different positions, sped up or slowed down, etc., we will have to manipulate this observable further down the line.
Event Streams for the Buttons Next, we can create event streams for the various buttons. For play, pause, and stop, we just want to know that the events happened. We don’t need any specific metadata from them. For the speed buttons however, we want to capture what speed they correspond with. That way, we can merge them into a single Observable called speed$ that we can use to rely on the speed value at any point in time. We will finish the speed$ Observable off with the operator startWith(1) to set the starting value to 1.
// Create click events for the play, pause, stop, and speed buttons
const play$ = Rx.Observable.fromEvent(document.querySelector("#play"), "click");
const pause$ = Rx.Observable.fromEvent(document.querySelector("#pause"), "click");
const stop$ = Rx.Observable.fromEvent(document.querySelector("#stop"), "click");

// Map to speed 1x button to the value 1 on click
const speed1x$ = Rx.Observable.fromEvent(document.querySelector("#speed1x"), "click")
    .mapTo(1);

// Map the speed 2x button to the value 2 on click
const speed2x$ = Rx.Observable.fromEvent(document.querySelector("#speed2x"), "click")
    .mapTo(2);

// Merge the speeds together into 1 stream, and start with 1 by default
const speed$ = speed1x$
	.merge(speed2x$)
	.startWith(1);
Add Scrubbing Functionality
Changing positions in a timer or progress bar is sometimes referred to as scrubbing. We have two conditions under which scrubbing should happen:
- The user could press the Stop button, which should reset the position to 0.
- The user could click or drag the slider anchor to a new position along the bar We can model both of these events together into a single stream for a scrubbed position:
// Create the change event for the slider for when a person clicks on the timer.
// Map it to the new value of the slider and convert that to a position on our timeline
var slider = document.querySelector("input");
var sliderChange$ = Rx.Observable.fromEvent(slider, "change")
    .map(evt=>evt.target.value / 100 * maxDuration);

// An observable of new times to jump to based on either stopping or clicking the timer range
const scrub$ = stop$.mapTo(0)
    .merge(sliderChange$);
We already have an Observable for stop events, so we just need to define one for manually changing the slider anchor position and then merge them together. We create an Observable from a change event on our slider and use the map() operator to get the current value in milliseconds. Since our slider goes from 0 to 100 and our timer goes from 0 to 10,000 milliseconds (defined in our maxDuration variable), we can convert the current slider value to a position in milliseconds by dividing the current slider position by 100 and then multiplying by the time duration.
For scrub$, we want to take our stop$ Observable and map the value to the constant 0, which will be the new scrubbed position. Then, we can merge it in with any sliderChange$ values to get a single stream for all scrubbed positions.
Calculating Incremental Intervals from the Timer This is admittedly where the logic gets a bit complicated; despite this complication, RxJS makes it easy to implement with its operators. Recall the d3 timer Observable from before. As stated, d3 timer does not have any functionality for pausing or skipping around. It can only play once and stop once. But for our progress bar, we want to be able to pause and scrub as needed. This will require us to use a new timer whenever we pause our bar, since we have to stop an existing timer. Furthermore, we can’t rely on our existing timer when we scrub because it only emits cumulative values.
Therefore, we are not going to use d3 timer to keep track of cumulative times elapsed. Instead, we are going to use it to emit incremental intervals of time. By incremental intervals, what I mean is that we are going to have it emit the milliseconds that have passed since the timer’s previously emitted value, aka the gaps in time. By having these elapsed intervals instead of a cumulative value, we can keep track of our current position in another way and use the d3 timer to just increment our progress position from whatever position it is in at that moment. We’ll do that later, but first let’s create an Observable of the intervals:
// Whenever someone presses play, create a new timer and calculate the intervals between each elapsed time
const interval$ = play$.switchMap(() =>
    timer$
        .startWith(0) // start with 0
        .pairwise() // emit the last 2 values at a time in an array
        .map(([a, b]) => b - a) // calculate the difference between the last two values
        .combineLatest(speed$, (interval, speed) => interval * speed) // multiply the interval by the current speed
        .takeUntil(pause$.merge(stop$)) // emit these timer intervals until a pause or stop event
);
First, we take the play$ stream and use a switchMap that will produce a new timer$ Observable each time that Play is clicked. This timer$ Observable will start with the value 0, emit the last 2 seen values at all times via the pairwise operator, and then map the output to the interval between the last two seen values. This gets us our incremental progress, rather than cumulative progress, from the d3 timer.
We add a couple other features here however. Previously we created a speed$ Observable that will emit the values 1 or 2 based on what speed the user has selected. We can incorporate this with our intervals to adjust the speed of our timer. The logic here is straightforward: if we want our timer to go twice as fast, we just need to multiply our incremental interval by 2! So every 50ms passed will be output as 100ms being passed, etc. We use combineLatest for this operation, which will combine the current value of an Observable with the latest seen value from a different Observable. Finally, we want our timer to stop whenever the user presses Pause or Stop. The takeUntil operator will subscribe to the Observable until an input Observable fires; in this case, our input Observable is the merging of pause$ and stop$ so that either one will stop the timer.
Getting the Progress Position
All of this code has led us to our ultimate goal: being able to track the position of our progress bar. We’ve coded two distinct ways that the position can change: either the timer pushes it forward, or a scrub event happens that causes it to skip to a new position. In order to accommodate both use-cases, we can take a redux-like approach to modeling this value. We can model the progress position as a “store”, with “reducers” that can be applied to that store. In our case there are two “actions”: increment the store value, or skip the store value to a new value.
We’ll start by mapping our “actions” to “reducers” in the form of functions that take in our progress value and return a new value. For the interval$ stream, it will return a function that takes in our previous value and returns the previous value + the latest interval. For the scrub$ stream, it will return a function that disregards the previous value and just returns a new value from scrubbing. Then we can apply those functions to our current value, using the scan operator to produce an accumulator function. Our scan will start with the value 0 and take in a function for how to modify that value. As we defined before, our functions will return a new value.
Finally, we don’t want our progress bar to exceed our defined duration so we will use a filter operator to remove any values greater than 10,000 ms:
// Use the interval stream with the scrub stream to either add time or jump in time
const time$ = interval$
    .map(m => (v) => v + m) // When interval stream fires, pass a function that takes previous value and adds latest interval
    .merge(scrub$.map(m => (v) => m)) // When the scrub stream fires, jump to the new value
    .startWith(0) // start the time at 0
    .scan((val, fn) => fn(val)) // for each value, apply the latest function that fired (either increment or jump)
    .filter(t=> t <= maxDuration); // only take times within our max duration range
Updating the DOM
Now that we have a time$ Observable for our progress position, we can use that value to update the DOM. We will update our ticker to display the current value and position the slider to its correct position based on the time and overall duration:
// Subscribe: Print the time and update the slider position
time$.subscribe(t=>{
    document.querySelector("#time").innerHTML = t
    slider.value = t / maxDuration * 100;
});
And there you have it! Definitely some complex topics in there, but it’s a testament to the Observable pattern that you can define complex functionality like that in such a declarative format. For more details on the various methods and operators we used to create and transform Observables, I find the API reference very handy.